Expert Roof Installation in West Hills, CA: Durable, Energy-Efficient, and Weather-Resistant Solutions

A high-quality roof installation is one of the most important investments you can make for your home in West Hills, CA. A properly installed roof not only enhances curb appeal but also provides long-term protection against harsh weather conditions, including intense heat, heavy rains, and strong winds. Whether you’re building a new home or replacing an old roof, choosing the right roofing materials and working with an experienced roofing contractor is essential. At High Level Roofing Inc., we specialize in durable, energy-efficient, and weather-resistant roofing solutions, ensuring your home stays secure and stylish for years to come.

Choosing the Best Materials for Roof Installation in West Hills, CA

Selecting the right roofing material is essential for a long-lasting and energy-efficient home. In West Hills, CA, homeowners need roofs that can withstand hot summers, seasonal rains, and occasional strong winds. The most popular options include asphalt shingles, metal roofing, and clay tiles.

Asphalt shingles are an affordable and versatile choice, offering durability and a variety of colors to match any home. Metal roofing is a great option for homeowners looking for energy efficiency and longevity, as it reflects heat and can last over 50 years. Clay tiles, while heavier and requiring a strong roof structure, provide excellent insulation and a classic, elegant look.

The right material depends on your budget, aesthetic preference, and long-term maintenance needs. At High Level Roofing Inc., we guide you through the selection process, ensuring your roof installation’s is built to withstand the local climate while enhancing your home’s value and appearance.

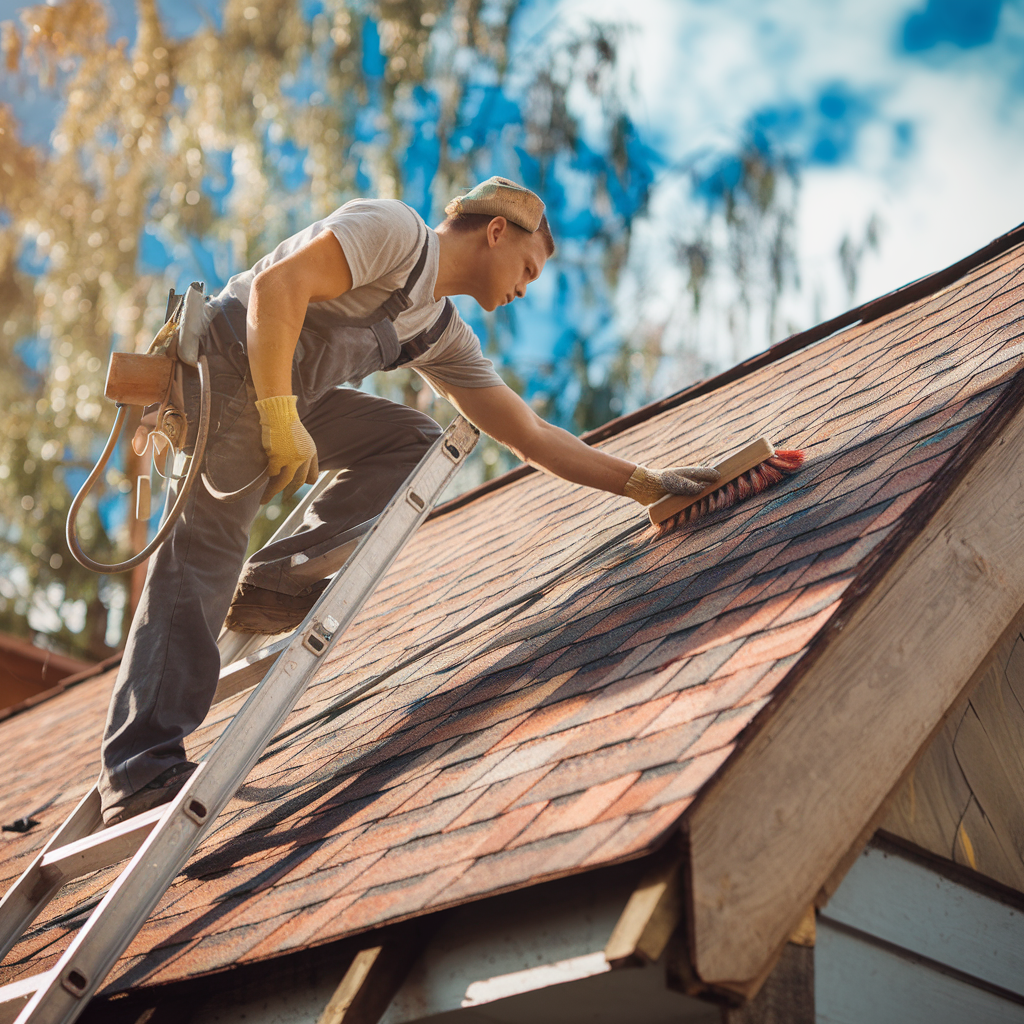
Why Professional Roof Installation’s Matters for Long-Term Performance

A roof is more than just shingles or tiles—it’s a system designed to protect your home from the elements. Proper roof installation’s ensures structural integrity, energy efficiency, and long-term durability. When done incorrectly, even high-quality materials can fail prematurely, leading to leaks, mold growth, and costly repairs.

Professional roofing contractors follow best practices, ensuring proper underlayment, ventilation, and flashing installation to prevent future issues. A well-installed roof improves insulation, helping maintain indoor temperatures and reducing energy bills. Additionally, hiring an experienced team ensures compliance with building codes and manufacturer warranties, protecting your investment.

At High Level Roofing Inc., we use top-quality materials and proven techniques to ensure your roof lasts for decades. We focus on precision, safety, and durability, providing homeowners in West Hills, CA with roofing solutions built to endure. Trust our expertise to give your home a strong, weather-resistant roof that adds long-term value.

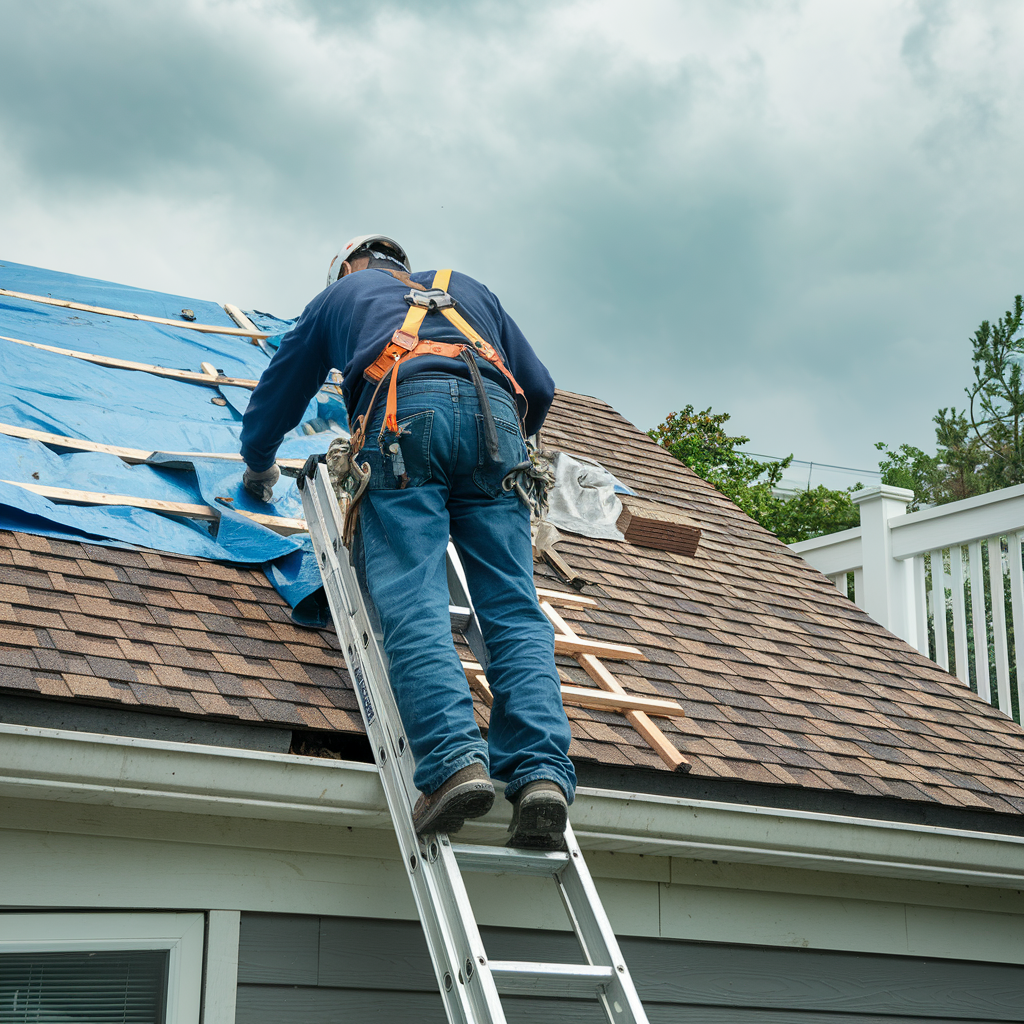
How Roof Installation’s Enhances Energy Efficiency and Weather Resistance

A properly installed roof does more than just protect your home—it enhances energy efficiency and weather resistance. In West Hills, CA, where hot summers and occasional storms are common, having a roof that regulates temperature and withstands harsh conditions is essential.

High-quality roofing materials like reflective metal, energy-efficient asphalt shingles, and well-insulated clay tiles help reduce heat absorption, keeping your home cooler and lowering air conditioning costs. Additionally, a correctly installed roof prevents air leaks, moisture buildup, and poor insulation, which can increase energy consumption.

When it comes to weather resistance, proper sealing, waterproof underlayment, and strong flashing ensure your roof can handle heavy rain, wind, and UV exposure. A well-installed roof not only protects your home from damage and costly repairs but also enhances indoor comfort.

At High Level Roofing Inc., we specialize in energy-efficient and weather-resistant roof installation, giving homeowners a secure and cost-effective roofing solution. Contact us today for a consultation!

How to Protect Roof Maintenance Gutters and Downspouts From Winter Weather

Winter weather can wreak havoc on your roof, gutters, and downspouts, making proactive roof maintenance essential. Snow, ice, and freezing temperatures can clog gutters, damage downspouts, and lead to ice dams that threaten your roof’s integrity. Proper preparation and maintenance ensure your gutters and downspouts remain functional throughout the season, protecting your roof and home from costly damage. From clearing debris to installing preventative measures, taking a few key steps before winter hits can make all the difference. In this guide, we’ll explore how to protect your roof, gutters, and downspouts from winter weather and ensure they perform efficiently under harsh conditions.

Cleaning and Preparing Gutters for Winter Roof Maintenance

Cleaning your gutters is one of the most important steps in roof maintenance’s before winter. Clogged gutters can cause water to back up, freeze, and lead to ice dams, which can damage both your roof and home. Start by removing leaves, twigs, and debris from the gutters. A small trowel or your hands (with gloves) works well for this task. Once the debris is cleared, flush the gutters with a garden hose to ensure water flows freely and check for any blockages in the downspouts.

While cleaning, inspect your gutters for damage like cracks or loose fasteners. Repairing these issues now will prevent further problems when snow and ice add weight to the system. Consider installing gutter guards to minimize debris buildup during the season. Proper preparation ensures your gutters function efficiently, protecting your roof and home from winter weather challenges.

Installing Preventative Measures to Protect Gutters and Downspouts

Preventative measures are essential for safeguarding gutters and downspouts during winter. Gutter guards are a great first step, as they keep leaves and debris out while allowing water to flow freely. For areas prone to ice dams, heat cables can be installed along the edges of your roof and gutters to prevent ice from forming.

Another helpful solution is splash blocks or gutter extensions at the bottom of downspouts. These direct water away from your home’s foundation, reducing the risk of freezing near the base. Ensure your downspouts are securely fastened and angled correctly for optimal drainage.

If heavy snow is a concern, consider adding snow guards to your roof. These devices prevent large sheets of snow from sliding off and damaging your gutters. By investing in these preventative measures, you can extend the lifespan of your gutters and downspouts while keeping your roof safe during winter.

The Role of Regular Roof Maintenance’s in Winter Weather Protection

Regular roof maintenance plays a crucial role in protecting your home from winter weather. Keeping your gutters and downspouts in good condition ensures water and melting snow drain properly, reducing the risk of ice dams and leaks. Schedule an inspection before winter to check for damaged shingles, loose flashing, or areas where water might pool.

During the season, monitor your roof for snow buildup and safely clear it if necessary. Heavy snow and ice can add weight, putting strain on your roof and gutters. Cleaning gutters regularly, even in winter, helps prevent clogs and allows water to flow freely.

Consistent maintenance not only protects your roof but also prevents costly repairs down the road. A well-maintained roof system—including gutters and downspouts—ensures your home stays dry, safe, and energy-efficient, even during harsh winter conditions.

Read More:

The Importance of Strengthening Your Roof Maintenance for Harsh Winter Conditions

The Importance of Strengthening Your Roof Maintenance for Harsh Winter Conditions

Winter weather can put significant strain on your roof, with heavy snow, ice, and freezing temperatures testing its durability. Without proper roof maintenance, even small vulnerabilities can lead to big problems, such as leaks, structural damage, and increased energy costs. Strengthening your roof before the harsh winter conditions arrive is essential for protecting your home and ensuring your roof can handle the season’s challenges. From reinforcing weak spots to improving insulation and drainage, taking proactive steps can save you from costly repairs and give you peace of mind. This guide will explore the importance of preparing your roof for winter and provide actionable tips to ensure it stays strong and resilient.

How Regular Roof Maintenance Prevents Winter Damage

Regular roof maintenance’s is your first line of defense against the harsh conditions of winter. By addressing small issues early, like loose shingles, damaged flashing, or minor leaks, you can prevent them from escalating when heavy snow and ice arrive. Routine inspections help identify weak spots that might not hold up under the weight of snow or during freezing temperatures.

Cleaning gutters is another essential task. Clogged gutters can cause water to back up and freeze, leading to ice dams that damage your roof and allow water to seep inside. Trimming nearby trees is equally important, as overhanging branches can snap under the weight of snow, damaging your roof.

Making roof maintenance’s a priority before winter not only prevents costly repairs but also extends the lifespan of your roof. A well-maintained roof keeps your home safe, warm, and protected when winter weather hits hard.

Reinforcing Key Areas to Strengthen Your Roof for Harsh Weather

Strengthening your roof for harsh winter conditions involves reinforcing the areas most vulnerable to damage. Start with the shingles—replace any that are cracked, curling, or missing to ensure they provide a solid barrier against snow and ice. Check the flashing around chimneys, vents, and skylights for gaps or corrosion, as these are common entry points for moisture.

Consider installing an ice and water shield under your shingles, especially along the edges and valleys of your roof. This extra layer helps protect against leaks caused by melting snow and ice dams. Inspect and, if needed, reinforce your roof’s structural components, such as rafters and decking, to ensure they can handle the additional weight of heavy snow.

By addressing these key areas before winter, you can significantly reduce the risk of damage and ensure your roof remains strong and reliable throughout the season.

The Role of Insulation and Proper Drainage in Winter Roof Protection

Insulation and proper drainage are critical aspects of roof maintenance that protect your home during winter. Adequate attic insulation prevents warm air from escaping, which helps maintain a consistent roof temperature. This reduces the risk of ice dams, which form when snow melts unevenly and refreezes at the roof’s edges.

Equally important is proper drainage. Clean gutters and downspouts allow water to flow freely, preventing backups that can freeze and damage your roof. If your home is prone to ice dams, consider installing heat cables or a snow guard system to promote safe melting and drainage.

Combining effective insulation and drainage ensures that your roof stays protected from the damaging effects of winter weather. These simple but impactful steps help prevent leaks, extend your roof’s lifespan, and keep your home warm and energy-efficient during even the harshest conditions.

Read More:

How to Protect Roof Maintenance Gutters and Downspouts From Winter Weather

Step-by-Step Guide to Winterizing Your Roof Maintenance Against Ice Damage

Step-by-Step Guide to Winterizing Your Roof Maintenance Against Ice Damage

Winter weather can be tough on your roof, especially when ice becomes a factor. Without proper roof maintenance, ice can lead to damage such as leaks, broken shingles, and even structural problems. Winterizing your roof is the best way to protect your home from ice-related issues and ensure it stays in top condition throughout the colder months. From inspecting vulnerable areas to improving insulation and managing snow buildup, taking the right steps now can save you from costly repairs later. This guide will walk you through the process of preparing your roof for winter, so you can keep your home safe and damage-free all season long.

Inspecting and Preparing Your Roof Maintenance for Winter Conditions

Before winter arrives, inspecting your roof is a critical part of roof maintenance’s to protect against ice damage. Start by looking for damaged or missing shingles, as these can allow moisture to seep in and freeze, causing further issues. Check the flashing around chimneys, vents, and skylights to ensure it’s securely in place, as these areas are prone to leaks during freezing weather.

Clean your gutters to prevent ice dams, which occur when melting snow refreezes along the roof edge, blocking water from draining. Clear debris from valleys and other low areas where ice may accumulate. Trim overhanging branches to keep snow and ice from falling onto your roof.

If you notice any weak spots or signs of wear, address them immediately by consulting a roofing professional. Proper preparation not only protects your roof but also ensures your home stays safe and warm throughout the winter season.

The Role of Insulation and Ventilation in Ice Damage Prevention

Proper insulation and ventilation are key components of roof maintenance’s that help prevent ice damage during winter. Insulation in your attic keeps warm air inside your home, preventing it from escaping and melting snow unevenly on your roof. Uneven melting can lead to ice dams, which can damage shingles and create leaks.

Ventilation is equally important. It allows cool air to flow through your attic, maintaining a consistent roof temperature and reducing the risk of ice formation. Without adequate ventilation, moisture can also build up, leading to mold and weakening your roof structure over time.

To ensure your roof is winter-ready, check your attic’s insulation levels and make sure vents are clear of obstructions. Adding insulation or installing additional vents may be necessary to optimize your roof’s performance. Together, insulation and ventilation create a balanced system that protects your roof from ice damage and keeps your home energy-efficient.

Essential Roof Maintenance Tips to Protect Against Ice Damage

Taking care of your roof before winter hits is the best way to prevent ice damage. Start by cleaning your gutters and downspouts to ensure proper drainage. Blocked gutters can cause ice dams to form, trapping water on your roof and leading to leaks.

Inspect your roof for any vulnerabilities, such as loose shingles, cracks, or damaged flashing. Fixing these small issues now can save you from costly repairs later. Consider applying a roof sealant or ice shield to create an extra barrier against moisture and freezing temperatures.

Regularly clear snow buildup from your Roof Maintenance using a roof rake to reduce the risk of ice accumulation. Be gentle to avoid damaging shingles or other materials. Finally, schedule a professional roof inspection if you’re unsure about your roof’s condition. Routine maintenance and proactive care ensure your roof stays strong and ice-free all winter long.

Read More:

The Importance of Strengthening Your Roof Maintenance for Harsh Winter Conditions

How to Prepare Your Roof Maintenance for Heavy Snow and Winter Storms

How to Prepare Your Roof Maintenance for Heavy Snow and Winter Storms

Winter storms and heavy snow can take a serious toll on your roof, making proactive roof maintenance essential for protecting your home. Preparing your roof for the winter season not only prevents damage caused by snow buildup, ice dams, and freezing temperatures but also ensures your home stays warm and safe throughout the colder months. From inspecting shingles and clearing gutters to reinforcing vulnerable areas, proper preparation can save you from costly repairs down the road. In this guide, we’ll cover practical tips and expert advice to help you get your roof winter-ready and avoid common issues during heavy snow and storms.

Inspecting and Reinforcing Your Roof Before Winter Hits

Before winter arrives, a thorough roof inspection is the first step in roof maintenance’s to prepare for heavy snow and storms. Start by checking for loose, damaged, or missing shingles that could allow water to seep in. Inspect flashing around chimneys, vents, and skylights for any gaps or signs of wear. These areas are common points of vulnerability during winter weather.

Pay close attention to the roof’s structure. Look for sagging areas or weak spots that may not handle heavy snow loads well. Reinforcing these areas with additional support, if needed, can prevent costly damage. Don’t forget to examine your attic for insulation and ventilation issues. Proper ventilation prevents moisture buildup and reduces the risk of ice dams.

Taking these proactive steps ensures your roof is strong and ready to withstand the challenges of winter, giving you peace of mind when the first snowstorm hits.

Clearing Gutters and Preventing Ice Dams with Proper Roof Maintenance

Clean gutters are essential for proper roof maintenance’s during the winter months. Clogged gutters can trap water, which may freeze and lead to ice dams. Ice dams form when melting snow refreezes at the roof’s edge, preventing water from draining properly. This can force water under the shingles and cause leaks.

Start by removing leaves, dirt, and debris from your gutters to ensure smooth water flow. Use a hose to check for blockages and confirm that downspouts are clear. Installing gutter guards can help prevent future clogs.

Additionally, consider adding insulation to your attic to keep your roof surface cooler, reducing the risk of snow melting unevenly and forming ice dams. These small yet effective maintenance tasks go a long way in protecting your roof and home from winter-related damage, keeping your gutters and roof functioning efficiently all season long.

Why Regular Roof Maintenance’s is Key for Winter Storm Readiness

Regular roof maintenance’s is your best defense against the harsh effects of winter storms. Consistent care ensures that minor issues, like worn shingles or damaged flashing, are addressed before they become costly problems during heavy snow or freezing conditions.

Frequent inspections help identify areas that may need reinforcement, such as weak spots in the structure that could buckle under heavy snow. Maintaining proper attic insulation and ventilation also reduces the risk of moisture buildup, ice dams, and energy loss during colder months.

Roof maintenance extends beyond repairs—it also includes clearing debris, trimming overhanging branches, and ensuring gutters are clean. These tasks may seem simple, but they play a big role in keeping your roof prepared for winter weather. By making maintenance a routine, you can ensure your roof is always ready to handle whatever winter throws your way, protecting your home and your peace of mind.

Read More:

Step-by-Step Guide to Winterizing Your Roof Maintenance Against Ice Damage

How to Trace Roof Repair Leaks from Interior Damage to the Source

Roof leaks can be frustrating and damaging, but finding their exact source is often a bigger challenge. While interior damage, such as water stains or peeling paint, provides clues, the actual leak might be in a different spot on your roof. Tracing roof leaks from interior damage to their source requires a careful, step-by-step approach to ensure proper roof repair. By understanding how water travels and knowing where to look, you can pinpoint the problem and address it before it worsens. This guide will walk you through the process of identifying roof leaks and connecting visible interior damage to the underlying roofing issue.

Analyzing Interior Damage for Clues About Roof Leaks

Interior damage is often the first sign of a roof leak, and understanding these clues can help you trace the problem to its source. Start by examining areas where water damage is visible. Look for water stains on ceilings or walls, which often appear as discolored patches with a ring-like pattern. Pay attention to peeling paint, warped surfaces, or bubbling wallpaper, as these are common indicators of moisture intrusion.

Don’t forget to check the attic. Dark spots, damp insulation, or visible mold growth in the attic often point to a leak nearby. Note the location of the damage relative to the roof structure. Water often travels along beams or through insulation, so the visible damage might not be directly below the leak.

Documenting these findings will help you narrow down potential problem areas, making it easier to trace the source and plan for effective roof repair’s .

Inspecting the Roof Exterior to Pinpoint the Leak Source

Once you’ve identified interior damage, the next step is to inspect your roof’s exterior to find the leak’s source. Start by examining the area above the interior damage for obvious signs of trouble, such as missing or damaged shingles, cracks, or holes. Pay close attention to areas around chimneys, vents, and skylights, as these are common leak entry points.

Look for loose or corroded flashing, which can allow water to seep in during heavy rain. Check the roof valleys, where two slopes meet, as these areas often experience pooling and are prone to leaks. Gutter systems should also be inspected—clogged or damaged gutters can cause water to back up and infiltrate your roof.

Using a garden hose to mimic rainfall can help you pinpoint the exact source of the leak. By identifying the problem area on your roof, you can take the first step toward effective roof repair’s .

When to Call a Professional for Accurate Roof Repair and Leak Detection

While some Roof Repair leaks can be traced and repaired with basic tools, others require the expertise of a professional. If you’ve inspected the interior and exterior of your home but can’t locate the source of the leak, it’s time to call in a roofing expert. Professionals use specialized tools, such as moisture meters and thermal imaging, to detect leaks hidden within your roof’s structure.

A professional roofer can also identify underlying issues, such as damaged flashing, worn shingles, or problems with the roof deck, that may not be visible to the untrained eye. Additionally, if the leak is severe or has caused extensive damage, quick intervention by a professional can prevent further issues, such as mold growth or structural weakening.

Hiring a roofing expert ensures the problem is resolved correctly and efficiently, giving you peace of mind and protecting your home from further damage.

Read More:

The Role of Professional Inspections in Detecting Roof Repair Leaks

The Role of Professional Inspections in Detecting Roof Repair Leaks

Detecting roof leaks early is essential for maintaining the integrity of your home, but spotting the signs on your own can be challenging. That’s where professional inspections play a crucial role. Roofing experts have the tools, experience, and knowledge to identify hidden problems that might go unnoticed by the untrained eye. Whether it’s subtle water stains, worn-out shingles, or underlying structural issues, professional inspections can pinpoint potential problems before they turn into costly roof repair projects. By investing in regular inspections, homeowners can protect their property, extend the lifespan of their roof, and avoid unexpected repair expenses. In this article, we’ll explore why professional inspections are indispensable for detecting roof leaks and ensuring your roof stays in top condition.

How Professional Inspections Identify Hidden Roof Repair Needs

Professional roof inspections are invaluable when it comes to identifying hidden issues that could lead to leaks or costly roof repair’s. While obvious signs like missing shingles or water stains are easy to spot, many problems lie beneath the surface. Roofing experts know where to look and have the tools to detect subtle issues, such as loose flashing, small punctures, or areas of weakened decking.

During an inspection, professionals carefully examine every part of your roof, including hard-to-reach areas like valleys, chimneys, and vents. They check for cracks, gaps, and signs of wear that may not be visible from the ground. Advanced techniques, such as moisture detection tools, help uncover leaks before they cause extensive damage.

By addressing these hidden issues early, you can save time, money, and stress, ensuring your roof stays in great shape and protects your home from the elements.

The Benefits of Early Detection Through Professional Roof Inspections

Early detection of roof problems is one of the biggest benefits of professional inspections. By identifying issues like small leaks, damaged shingles, or clogged gutters early on, you can prevent them from turning into more serious problems that require extensive roof repair’s.

Inspections also save you money in the long run. A minor fix today costs far less than repairing significant water damage or replacing an entire roof later. Early detection helps you plan for necessary maintenance, avoiding the surprise of sudden and expensive repairs.

Additionally, regular professional inspections can extend the lifespan of your roof. By catching wear and tear before it worsens, you ensure your roofing materials perform at their best. Peace of mind is another bonus—knowing your roof is in good condition allows you to focus on other priorities without worrying about unexpected problems.

Why Regular Inspections Are Key to Preventing Major Roof repair’s Costs

Regular Roof Repair inspections are a proactive way to avoid costly repairs and keep your roof in excellent condition. Over time, exposure to harsh weather, debris, and general wear can lead to minor damage that, if left unchecked, can escalate into major issues.

By scheduling inspections annually or after severe weather events, you give professionals the opportunity to catch and fix small problems before they worsen. For example, a loose shingle or damaged flashing might seem insignificant, but it can lead to leaks, water damage, and even structural problems if ignored.

Regular inspections also provide insights into your roof’s overall condition, helping you plan for future maintenance or replacement. This proactive approach not only prevents unexpected repair costs but also helps maintain your home’s value and integrity. With regular care, you can avoid surprises and ensure your roof continues to protect your home for years to come.

Read More:

How to Trace Roof Repair Leaks from Interior Damage to the Source

Step-by-Step Guide to Identifying Common Causes of Roof Repair Leaks

Step-by-Step Guide to Identifying Common Causes of Roof Repair Leaks

Roof leaks are among the most common issues homeowners face, and identifying their root cause is the first step toward effective roof repair. Whether it’s damaged shingles, clogged gutters, or worn flashing, understanding the underlying problem helps you take timely action and prevent further damage to your home. While some causes are easy to spot, others may require a closer inspection to uncover hidden trouble spots. By following a step-by-step approach, you can pinpoint the source of the leak and decide whether a quick fix or professional roof repair’s is necessary. In this guide, we’ll explore the most common causes of roof leaks and how to identify them efficiently.

Inspecting Shingles and Flashing: Top Culprits Behind Roof Leaks

Shingles and flashing are often the first areas to inspect when dealing with roof leaks. Shingles act as the first line of defense against weather, but over time, they can become cracked, curled, or even go missing due to high winds or storms. Damaged or missing shingles leave your roof vulnerable to water seeping through.

Flashing, the metal strips that seal edges, chimneys, and vents, is another common trouble spot. If flashing becomes loose or corroded, it can no longer provide a watertight barrier, allowing leaks to develop around these critical areas.

To inspect shingles and flashing, start by looking for visible damage from the ground or safely from a ladder. Spotting cracked, discolored, or missing shingles is a clear sign of trouble. Around vents or chimneys, check for gaps in the flashing or rust. Addressing these issues promptly can prevent the need for extensive roof repair’s down the line.

How Clogged Gutters and Poor Drainage Lead to Roof Repair Issues

Clogged gutters may seem like a minor inconvenience, but they can cause major roof repair’s problems. Gutters are designed to channel water away from your roof and home. When they’re blocked with leaves, dirt, or debris, water backs up and can seep under your roofing materials, leading to leaks and water damage.

Poor drainage also causes water to pool on your roof, especially in areas with flat or low slopes. Standing water accelerates the wear on shingles and can create weak spots where leaks develop. Over time, this excess moisture can even lead to structural damage in your roof deck.

Regularly cleaning your gutters and ensuring proper drainage is a simple yet effective way to prevent roof leaks. If you notice water spilling over the edges of your gutters or pooling near your home’s foundation, it’s time to address the problem before it leads to costly repairs.

When Structural Problems Contribute to Roof Leaks and Repairs

Structural issues in your roof can be a hidden cause of leaks, often requiring immediate roof repair. Over time, your roof deck may weaken due to age, improper installation, or prolonged exposure to moisture. A sagging roof or noticeable dips in the surface are telltale signs of structural problems that can lead to water infiltration.

Additionally, poor attic ventilation can trap heat and moisture, creating conditions that weaken the underlying structure. This buildup not only damages the decking but also compromises the effectiveness of your roofing materials.

Another common issue is improper roof slope. A roof that’s too flat or steep can prevent water from draining correctly, increasing the risk of pooling and leaks. Regular inspections by a professional can help identify and address structural problems early. Fixing these issues ensures your roof remains strong and leak-free for years to come.

Read More:

The Role of Professional Inspections in Detecting Roof Repair Leaks

How to Spot the Early Signs of Roof Repair Leaks in Your Home

How to Spot the Early Signs of Roof Repair Leaks in Your Home

Roof leaks can cause significant damage if left unchecked, making early detection crucial for protecting your home. Recognizing the warning signs of potential issues allows you to address them before they escalate into costly roof repair projects. Whether it’s water stains on your ceiling, missing shingles, or unexplained dampness, these subtle indicators often signal the need for professional attention. Understanding the early signs of roof leaks can save you time, money, and stress, ensuring your roof remains in top condition. In this guide, we’ll explore how to spot the initial signs of roof repair’s leaks and when to call in the experts to prevent further damage.

Common Warning Signs of Roof Repair Leaks to Watch For

Spotting roof leaks early can save you from costly repairs. One of the most common signs is water stains on your ceiling or walls, often appearing as discolored patches or rings. If you notice damp spots or peeling paint, it could indicate moisture seeping through your roof. Another clue is missing or damaged shingles. Strong winds or heavy storms can dislodge shingles, leaving your roof vulnerable to leaks.

Keep an eye out for granules from asphalt shingles collecting in your gutters—this can signal shingle wear and reduced protection. Inside your attic, look for sunlight peeking through the roof or areas that feel damp or humid. Mold or mildew growth, accompanied by musty odors, is another warning sign that moisture is trapped. Recognizing these early indicators can help you address problems promptly and prevent the need for extensive roof repair’s .

How Roof Leaks Lead to the Need for Immediate Roof repair’s

Even minor roof leaks can lead to significant issues if not repaired promptly. Water entering your home can damage insulation, drywall, and wood framing, weakening the structural integrity of your property. Over time, leaks can also create the perfect conditions for mold and mildew to thrive, posing health risks to your family and requiring costly remediation.

A small leak may start as a few drips during a storm but can quickly escalate into more extensive water damage. Continuous exposure to moisture can cause your roof deck to rot, making future repairs more complicated and expensive. Additionally, unchecked leaks can lead to electrical hazards if water reaches wiring or fixtures.

Addressing leaks as soon as they’re discovered is essential for preventing these problems. Early roof repair’s not only protects your home but also extends the lifespan of your roof, saving you time and money in the long run.

When to Call a Professional for Roof Repair’s and Leak Prevention

Knowing when to call a professional is crucial for effective roof repair. If you notice persistent leaks, significant water stains, or missing shingles, it’s time to bring in an expert. DIY fixes may seem appealing, but they often provide only temporary relief and can worsen the problem if not handled correctly.

Professional roofers can identify the root cause of the leak, whether it’s damaged flashing, clogged gutters, or worn shingles. They have the tools and expertise to address the issue and prevent further damage. If you experience frequent storms or your roof is aging, scheduling a professional inspection can catch hidden problems before they develop into serious leaks.

Regular maintenance and prompt repair by a professional can save you from costly future repairs and protect your home from further damage. Don’t wait—call a roofing expert to ensure your roof remains leak-free and in excellent condition.

Read More:

Step-by-Step Guide to Identifying Common Causes of Roof Repair Leaks

Understanding the Timeline for Residential Roof Installation Projects

When planning a residential roof installation, understanding the timeline is essential for a stress-free experience. Knowing how long each step of the process takes can help you prepare your home, schedule your time, and manage expectations. While the exact duration of a roof installation’s depends on factors like the size of your roof, the materials used, and the weather, most projects follow a standard timeline. From initial planning and material selection to the final inspection and cleanup, each phase plays a critical role in ensuring a successful installation. In this guide, we’ll break down the typical timeline for residential roof installation’s projects, so you know what to expect and how to stay prepared every step of the way.

Planning and Preparation: Setting the Stage for Your Roof Installation

The planning and preparation phase is the foundation of any successful roof installation’s . It begins with choosing the right contractor. Research and select a reliable professional with positive reviews and experience in residential roofing. Once your contractor is confirmed, discuss the project timeline and budget. Ensuring everything aligns with your expectations.

Next, select the roofing materials that best suit your home’s style, climate, and budget. Your contractor can provide samples and recommendations to help you make an informed decision. After materials are chosen. Permits and approvals are typically arranged by the contractor to meet local regulations.

Before installation day, prepare your home by clearing your yard. Securing fragile items inside, and informing neighbors about the upcoming project. Proper planning and preparation not only streamline the process but also minimize disruptions and surprises, ensuring your roof installation’s gets off to a smooth start.

The Roof installation’s Process: Breaking Down Each Step

The roof installation’s process is a carefully planned series of steps designed to ensure a durable and long-lasting result. It starts with removing the old roof, during which shingles and underlayment are stripped away to expose the decking. This allows the contractor to inspect and replace any damaged areas, creating a solid foundation for your new roof.

Next, a protective underlayment is installed, acting as a barrier against moisture and weather. Flashing is added around vents, chimneys, and other vulnerable areas to prevent leaks. The final layer is the roofing material you’ve chosen, such as asphalt shingles, metal panels, or tiles, installed with precision to ensure proper alignment and durability.

Once the roof is in place, the crew cleans up the area, removing debris and inspecting their work to ensure everything meets quality standards. The process is handled with care, resulting in a roof that provides reliable protection for years.

Factors That Can Impact Your Roof installation’s Timeline

Several factors can influence how long a roof installation’s takes, so it’s helpful to be aware of them. Weather is one of the biggest variables. Rain, wind, or extreme heat can delay the process, as safety and quality must be prioritized. The size and complexity of your roof also play a role. A larger roof or one with steep slopes and multiple angles will require more time to complete.

Material choice can also affect the timeline. While asphalt shingles are quick to install, materials like tile or metal may take longer due to their weight and the need for precise placement. Additionally, any necessary repairs to the roof deck, such as replacing damaged wood, can extend the project.

Finally, scheduling with your contractor and securing materials can sometimes cause delays, especially during busy seasons. Understanding these factors helps set realistic expectations and ensures a smoother roof installation experience.

Read More:

A Homeowner’s Checklist for Preparing for a New Roof Installation

Get a Free Consultation Now!

Skip to content